
TEXT: Content of image-based slide above:
Introduction to the Linux Kernel
Customized Linux Kernel:
What? Why? How?
Presented by: ME of NBLUG
M.E.'s comments about the above slide
Welcome to NBLUG. I am Michael Egan, the acting president of NBLUG. We have a website at http://www.nblug.org/ and several mailing lists. If you are not subscribed to any, you should at least subscribe to our low volume announce list to hear about upcoming events and meetings. We also have a talk list, and an IRC channel
Before we begin, I want you all to know that building a kernel is a process that is not quick -- especially for the beginner. It can take 8 hours or more just to configure your first kernel.
[Upon asking the audience, "How long did it take you to configure and build your first kernel?" some answers:]
- 12 hours
- 16 hours
- 1 day
- 2 days
However, once you have configured and built your own working kernel, future configures and builds take much less time.
TEXT: Content of image-based slide above:
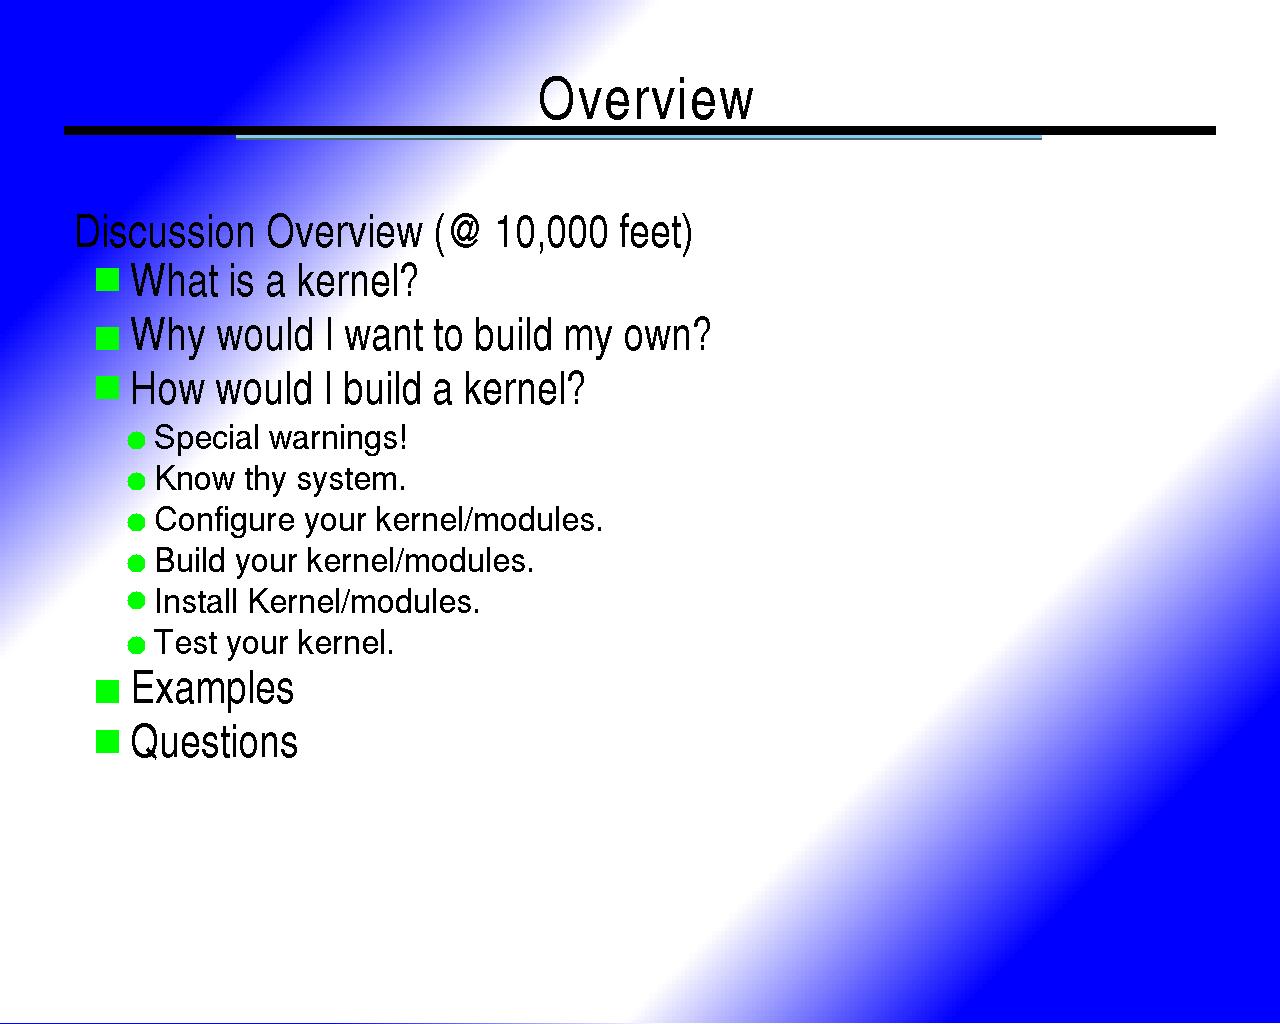
Overview
Discussion Overview (@ 10,000 feet)
- What is a kernel?
- Why would I want to build my own?
- How would I build a kernel?
- Special warnings!
- Know thy system.
- Configure your kernel/modules.
- Build your kernel/modules.
- Install Kernel/modules.
- Test your kernel.
- Examples
- Questions
M.E.'s comments about the above slide
For those who might want to see what we will cover, this slide offers an overview of the topics.
NOTE: this is not an advanced review of Linux kernel internals or meant to offer advanced users information about kernel building. This talk is targeted at informing beginner and intermediate users who want to know about building a kernel, and have never done so.
Many documents exist "out there" on the Internet that can explain "howto" build a kernel, but few offer you tools on the most important part of the kernel build process: choosing what options to enable during the config stage.
This will not be a complete review of a kernel build, but links will be provided to other sites that offer more details.
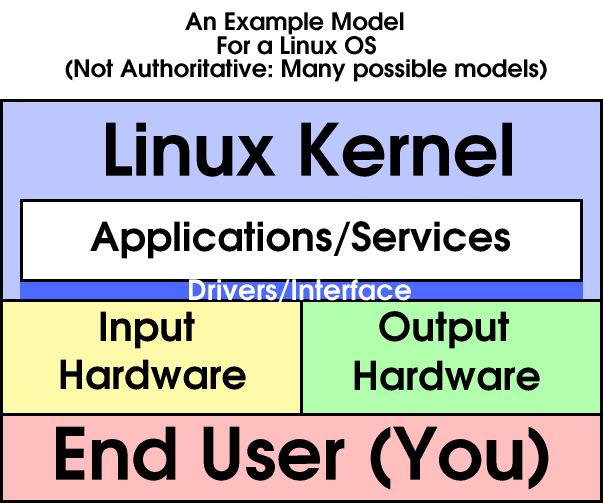
TEXT: Content of image-based slide above:
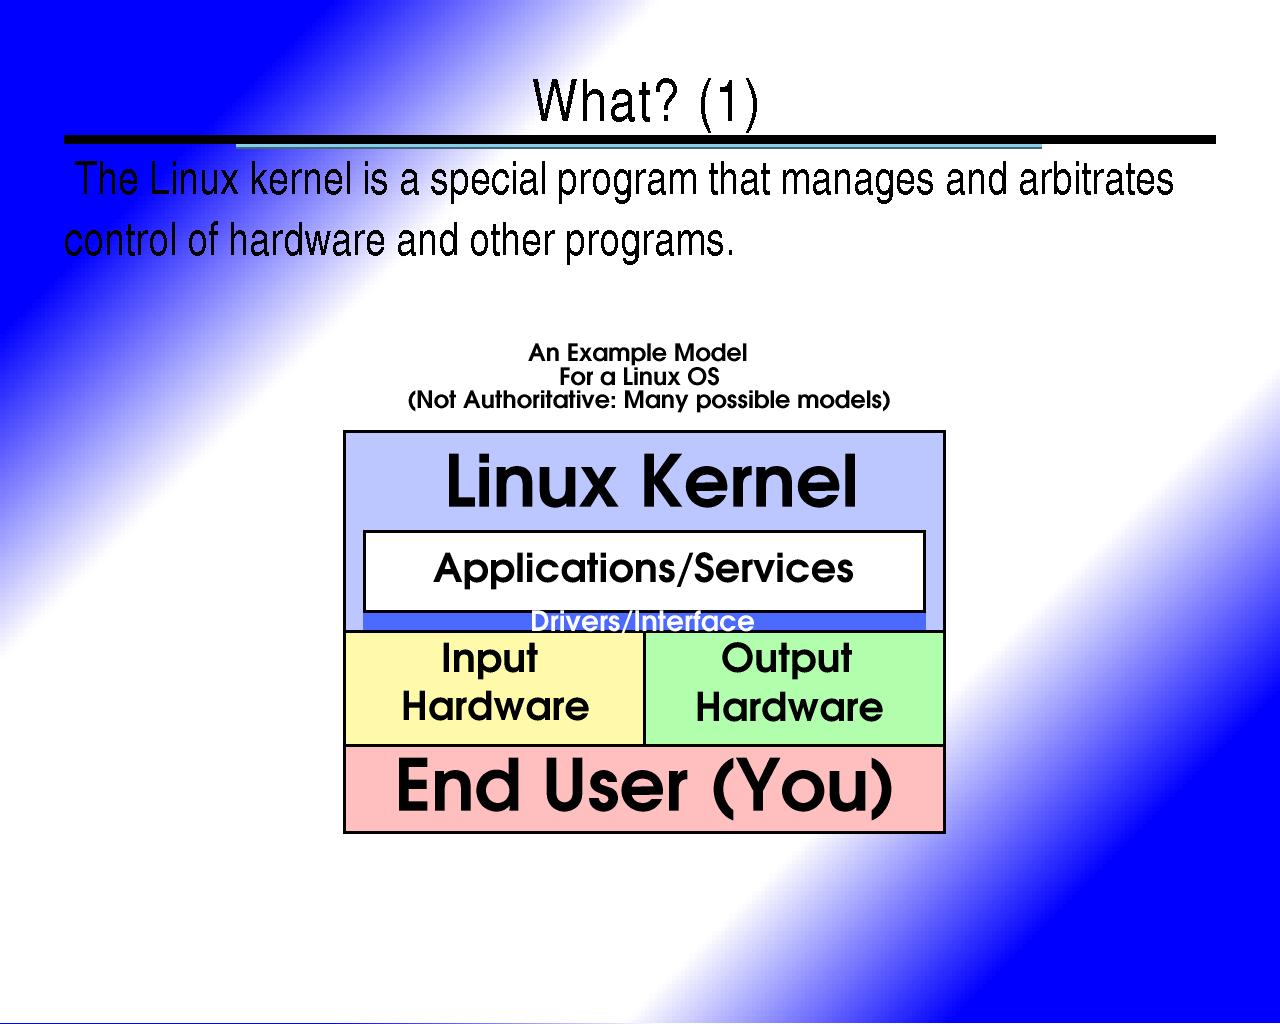
What? (1)
The Linux kernel is a special program that manages and arbitrates control of hardware and other programs.
Model from slide above in ASCII Art:
             An Example Model
              for a Linux OS
(Not Authoritative: Many possible models)
-----------------------------------------
|       L I N U X     K E R N E L       |
|                                       |
|  -----------------------------------  |
|  |      Applications / Services    |  |
|  |_________________________________|  |
|  |    Drivers and HW Interfaces    |  |
|---------------------------------------|
|       Input       |      Output       |
|      Hardware     |     Hardware      |
|---------------------------------------|
|    End Users like you and users of    |
|             your services             |
|---------------------------------------|
M.E.'s comments about the above slide
I worked out this simple model for a kernel to better describe what a kernel is by where it "lives." You as a user do not touch the kernel. You touch the input and output hardware. That hardware uses "drivers" (that are part of the kernel) to talk to applications or services running on the CPU and in RAM. Some input/output hardware can talk to other input/output hardware directly (without using the kernel - special cases) but most pieces of hardware talk through drivers to applications (and/or other parts of the kernel) before talking to each other. In some cases the Linux kernel "Talks" to hardware without talking through conventional drivers/interfaces (uncommon.)
You can effectively consider the kernel as a kind of super application that controls other programs, access of programs to resources (such as memory, or other programs or hardware) and controls the flow of data to and from applications and/or hardware.
Though the model is far from perfect, and the quote at the top of the slide is an over-simplification of what the kernel is/does, it is "good enough" a description for an introductory presentation.
TEXT: Content of image-based slide above:
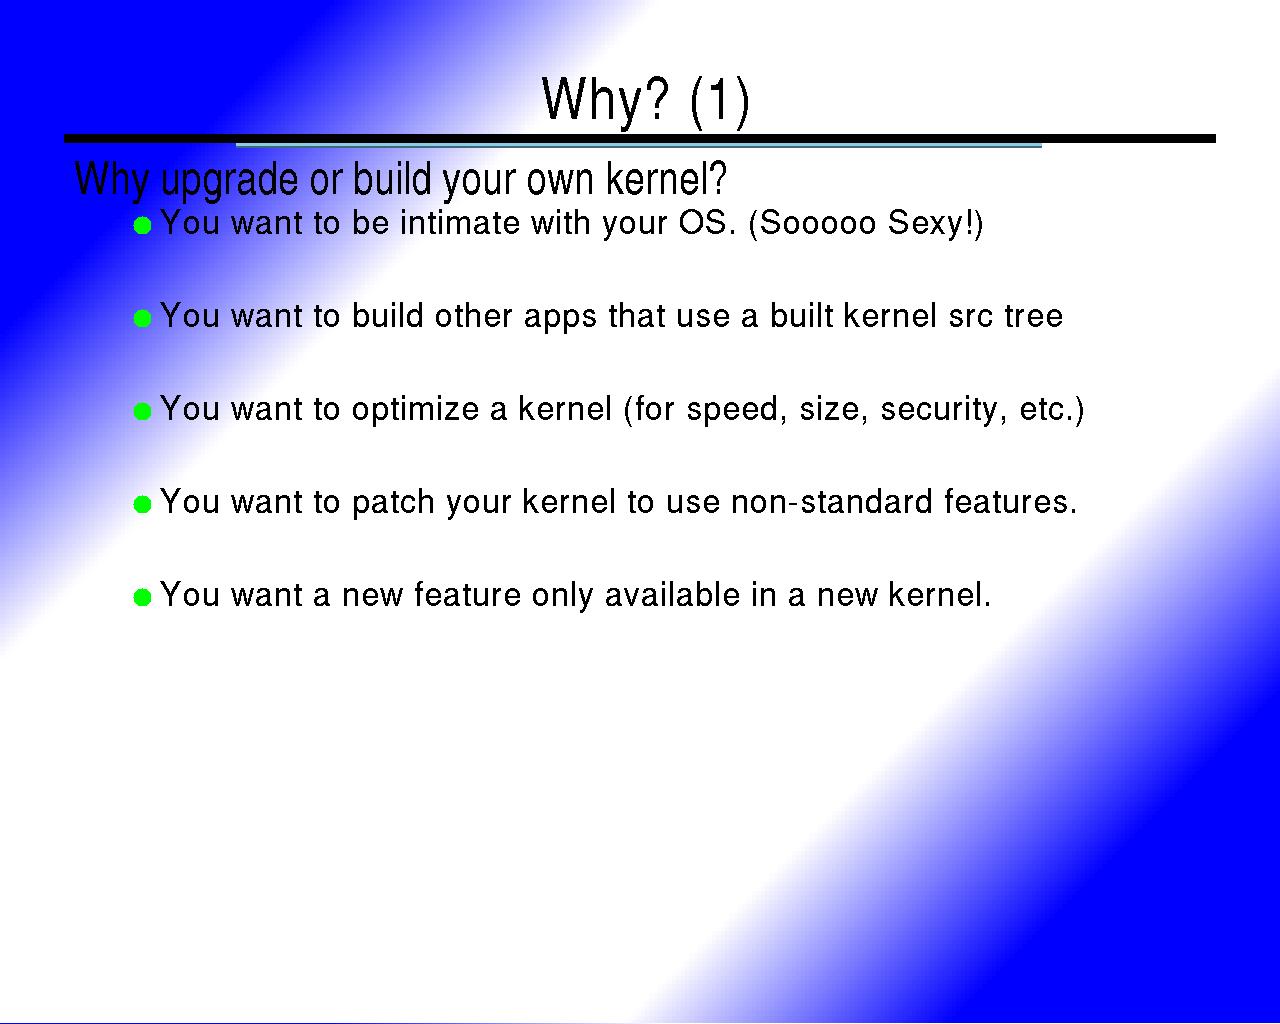
Why? (1)
Why upgrade or build your own kernel?
- You want to be intimate with your OS. (Sooooo Sexy!)
- You want to build other apps that use a built kernel src tree
- You want to optimize a kernel (for speed, size, security, etc.)
- You want to patch your kernel to use non-standard features.
- You want a new feature only available in a new kernel.
M.E.'s comments about the above slide
Several reasons why many people build their own kernel...
More details added due to feedback from the nblug talk list:
Some projects require a configured and built kernel source tree if you wish to build them by hand.
- A source copy of pcmcia-cs
- The latest wireless sniffing tools built from source
- Drivers for hardware like nVidia's Kernel modules for Video Acceleration in X.
- others...
Optimization of your kernel (examples)
- Optimize as a route/firewall
- Optimize for size of kernel with limited hardware support
- Optimize for security with extra enhancements (e.g. remove modules support, remove networking support, limit drivers)
- Optimize for speed
You want to add new features not found in some vendor kernels:
- Magic Sys-Key request
- Remove Module support
- Patch the kernel with a diff patch.
TEXT: Content of image-based slide above:
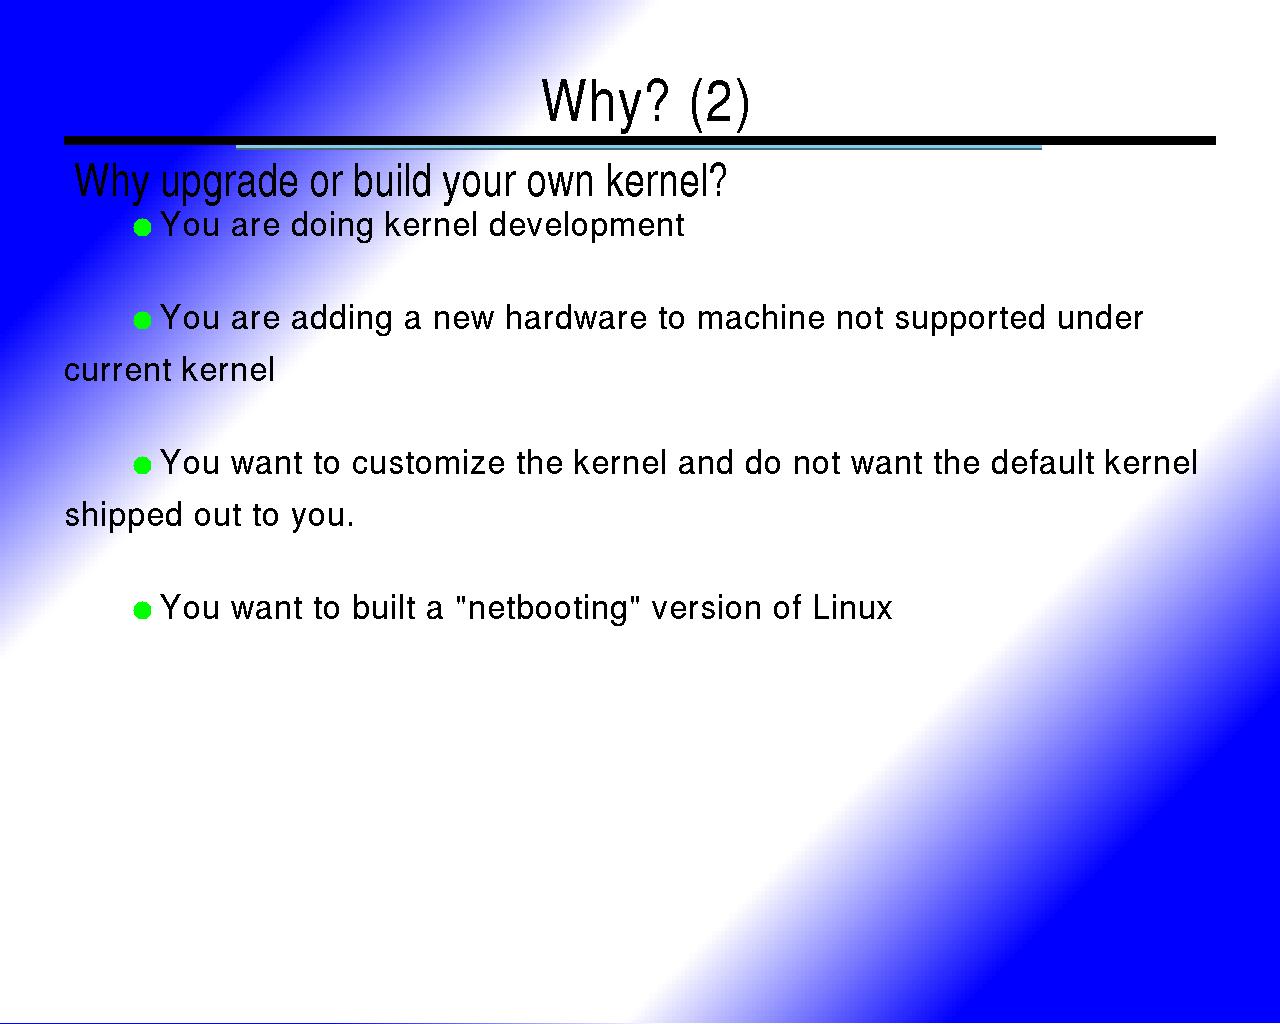
Why? (2)
Why upgrade or build your own kernel?
- You are doing kernel development
- You are adding a new hardware to machine not supported under current kernel
- You want to customize the kernel and do not want the default kernel shipped out to you.
- You want to built a "netbooting" version of Linux
M.E.'s comments about the above slide
Several reasons why many people build their own kernel...
Details offered as a result of conversation on our nblug talk list:
You want to gain support for new hardware not yet supported by your vendor
- New Network interface card is supported in new kernel but not the kernel provided by your distributor or any of the latest updates do not offer such support.
- You want to get the latest pcmcia-cs and are too impatient to wait for your distro maintainers to build one.
TEXT: Content of image-based slide above:
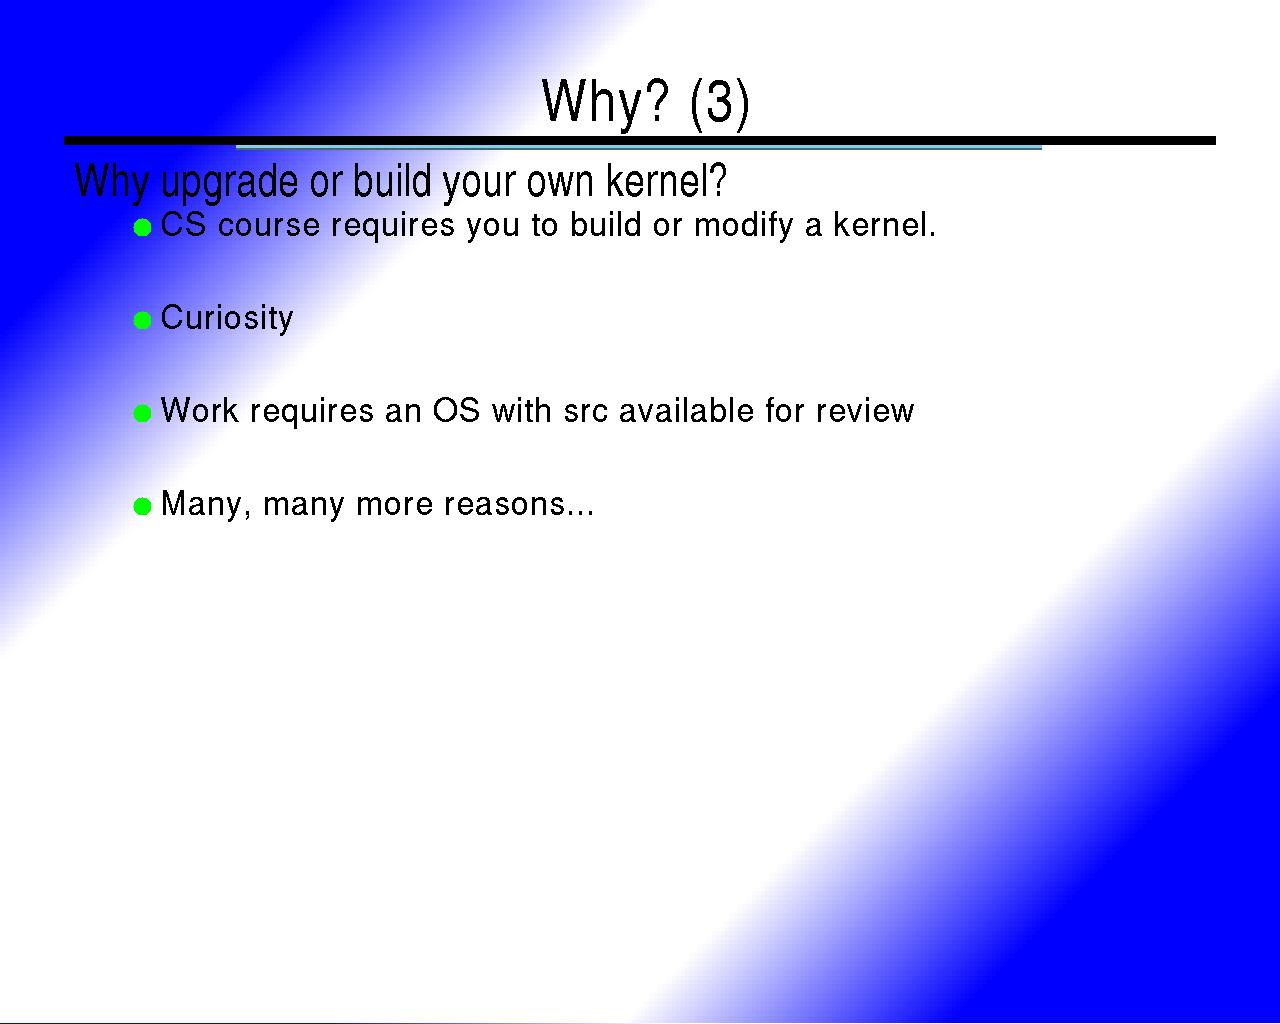
Why? (3)
Why upgrade or build your own kernel?
- CS course requires you to build or modify a kernel.
- Curiosity
- Work requires an OS with src available for review
- Many, many more reasons...
M.E.'s comments about the above slide
Several reasons why many people build their own kernel...
Others in the audience offered more reasons:
- Special embedded hardware with size and hardware restrictions
- (more- can't remember)

TEXT: Content of image-based slide above:
How? (0): Review
How to build a kernel:
- Special warnings!
- Know thy system.
- Configure your kernel/modules.
- Build your kernel/modules.
- Install Kernel/modules.
- Test your kernel.
M.E.'s comments about the above slide
Review of what we will now be covering on the kernel build/install.
TEXT: Content of image-based slide above:
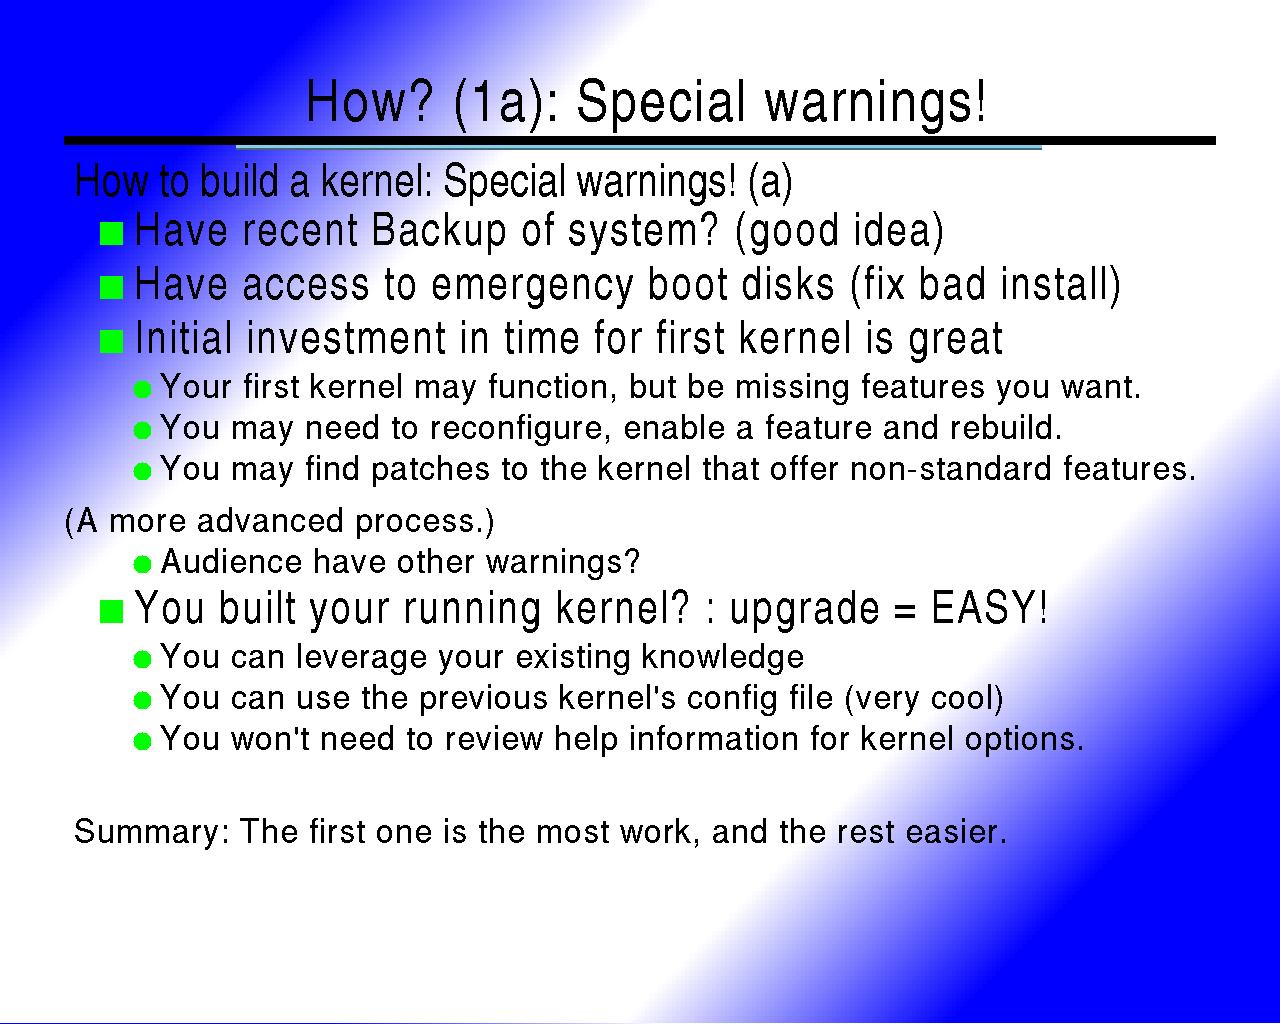
How? (1a): Special warnings!
How to build a kernel: Special warnings! (a)
- Have recent Backup of system? (good idea)
- Have access to emergency boot disks (fix bad install)
- Initial investment in time for first kernel is great
- Your first kernel may function, but be missing features you want.
- You may need to reconfigure, enable a feature and rebuild.
- You may find patches to the kernel that offer non-standard features. (A more advanced process.)
- Audience have other warnings?
- You built your running kernel? : upgrade = EASY!
- You can leverage your existing knowledge
- You can use the previous kernel's config file (very cool)
- You won't need to review help information for kernel options.
Summary: The first one is the most work, and the rest easier.
M.E.'s comments about the above slide
Not much to add here. I briefly reiterated each of the items and explained some reasons. Some of the items are common sense. More comments on the list:
- Backup? Good idea. I have never lost data as a result of a kernel upgrade, but backups are a good for people anyway.
- Emergency boot disk: Many distributions offer you an Emergency Boot Disk (EBD) in the form of one of the disks used to install your system. Each distro has their own procedure for using this disk. This is a very important item. There are a few cases where such a disk would be helpful when installing a new kernel:
- The new kernel you have built will not boot your system to a new prompt or login, and you have made choosing a previous kernel impossible.
- Something was omitted or incorrectly specified in the setup of the new kernel to be booted when you configured your boot loader (grub, lilo, etc.)
- Something else that makes your machine unbootable from your hard drive.
- A kernel build for a first time kernel builder is an iterative process of refinement. I do not know any first time kernel builder who has selected each and every option they need for their hardware (and none of the options they did not need) in the first pass of configuring a kernel. After you are using the new kernel, you may notice some functionality missing. Create a list of missing functions and then look through the parts of the kernel configuration to see what you can enable to get support for those items. (For example, maybe before the upgrade your printer port worked and now it does not, or your network interface card no longer seems to be recognized... these are examples of functional attributes that are missing.)
- After you have built a first working kernel, future kernels are easier when you copy the ".config" file over from the previous kernel to the new kernel's src tree and use "make old config" (more on this later.)
TEXT: Content of image-based slide above:
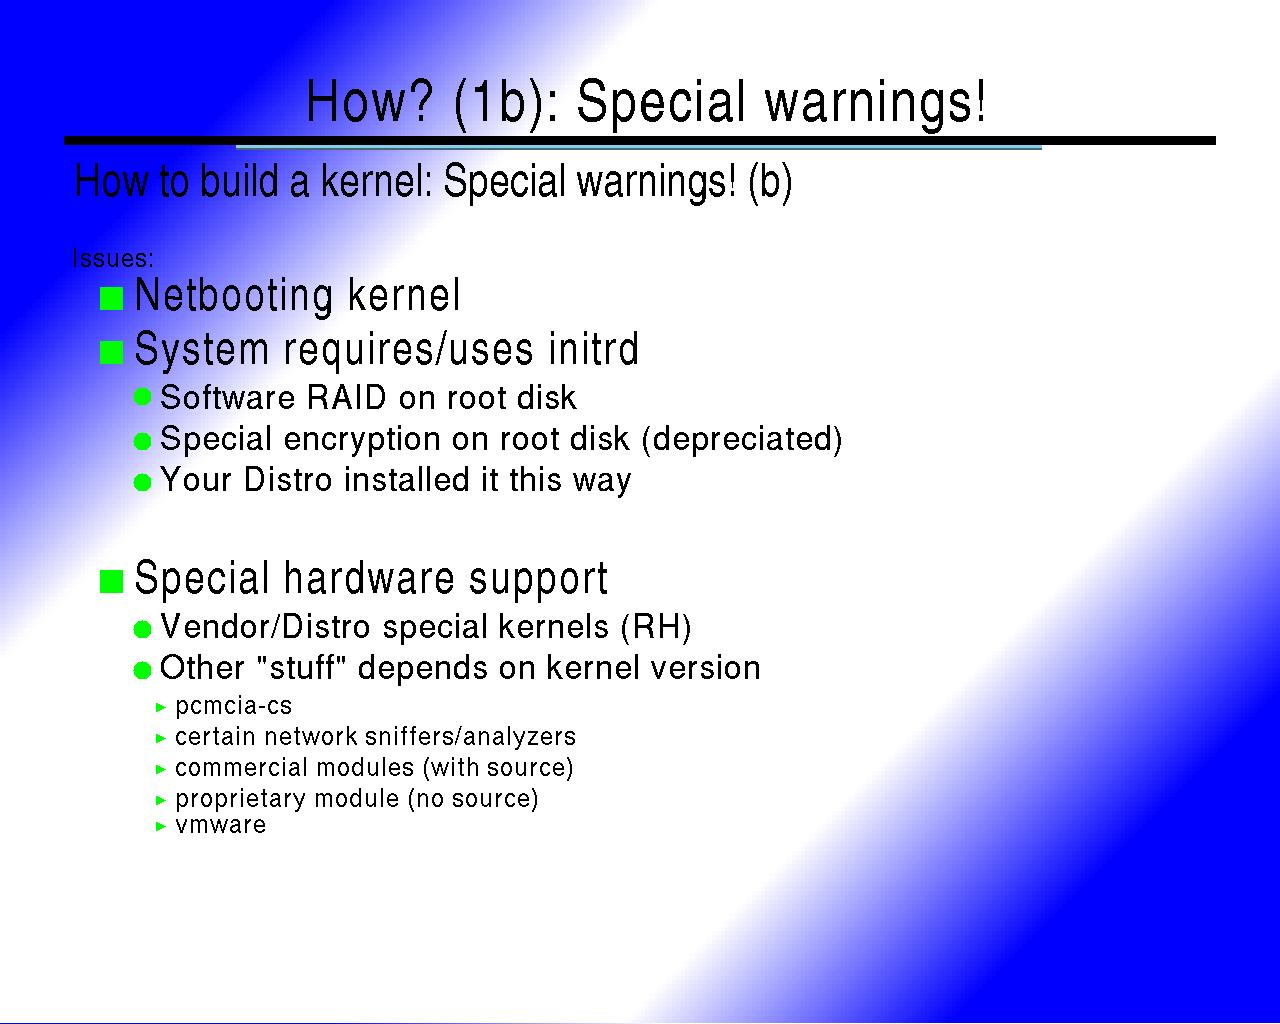
How? (1b): Special warnings!
How to build a kernel: Special warnings! (b)
Issues:
- Netbooting kernel
- System requires/uses initrd
- Software RAID on root disk
- Special encryption on root disk (depreciated)
- Your Distro installed it this way
Special hardware support
- Vendor/Distro special kernels (RH)
- Other "stuff" depends on kernel version
- pcmcia-cs
- certain network sniffers/analyzers
- commercial modules (with source)
- proprietary module (no source)
- vmware
M.E.'s comments about the above slide
There are many ways to specialize your own kernel. Also, each distribution may have their own "approved kernel building procedures." Most of time, you should be able to use a stock kernel and make it work, but you may find it easier to use your vendor's approved methods. (For example the RedHat packaged kernels include additions to stock kernels that support more hardware. As a result, if you compare a RedHat kernel with the same kernel version as a stock kernel of the same version, the RedHat kernel source will likely have more drivers.)
Comment from the audience: But RedHat takes the driver modifications and additions and submits those changes back into the core kernel for everyone to share. This is true, but there is no guarantee for all submitted changed to be incorporated into the kernel. Also, RH may package extra drivers (provided by vendors of hardware) that have not been merged with the stock kernel trees (and may not ever be merged.) In favor of the audience member's statement, RedHat employs many kernel Developers and can use this as an advantage for getting their modifications approved for entry into the kernel.
Some Warnings exist when a user is looking to configure and build their own kernel.
- initrd (initial root disk) is a system by which a kernel is booted from a kernel with special a "initrd" option and other initrd supported configuration options. An initrd based system can be nice, but is not suggested for the beginner. The process for building an initrd-based kernel won't be covered here. What is this? Imagine a special file that is really like an image of a disk. This file can be treated like an actual disk during boot by an initrd enabled kernel (with other support options required.) This image file contains other files inside of it that include modules for the newly built kernel, a root file system and some basic commands to get a new kernel running so that it can load the modules it needs in order to switch the root filesystem from the initrd image to your hard disk and finish booting. An initrd based boot is sexy in some respects: it permits having software-based RAID on your root filesystem, it permits distributions to install a skeleton of a kernel and only load the modules that are necessary to boot, with modifications to a stock kernel, you can enable encryption on the root filesystem, and many other things.
- pcmcia-cs If you are using pcmcia-cs (for a laptop for example) to get pcmcia cards (renamed to "PC Cards") to work, then you should note that pcmcia is primarily kernel dependent. When you change to a new kernel version, you may lose support for PCMCIA based cards unless you download, configure and install pcmcia-cs from source. http://sourceforge.net/projects/pcmcia-cs/.
- Certain applications that are built against your current kernel (there are some sniffers and network analyzers that use information about network interface cards to aid sniffing network traffic, and these may need to be compiled against a new kernel if you change versions.
- Some hardware vendors provide object-based modules that are inserted into your current, vendor provided kernel. One example is nVidia. There are special modules that you can install into your kernel, but they depend upon the version of kernel being used as being the same as what you distro has offered. In such cases, you may need to download source version from the hardware vendor, configure, build and install these on your own. (Another case can include some winmodems with extra modules to enable them.)
- Cases with special programs that come with their own drivers and source like vmware. After building a new kernel, root must run vmware-configure to regain access.
- There may be others, and likely are others...
TEXT: Content of image-based slide above:
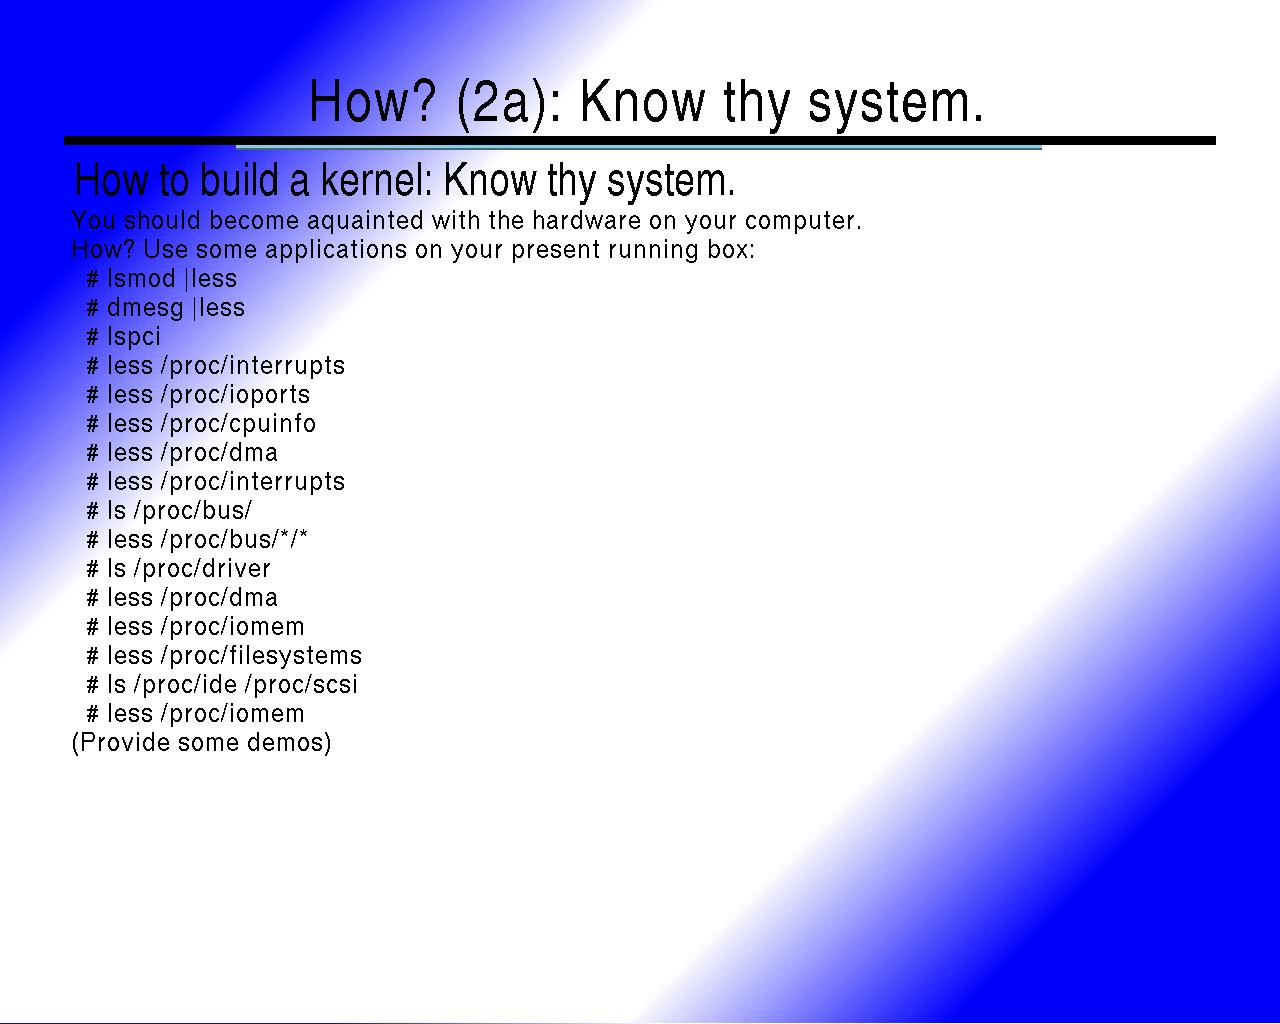
How? (2a): Know thy system.
How to build a kernel: Know thy system.
You should become acquainted with the hardware on your computer.
How? Use some applications on your present running box:
  # lsmod |less
  # dmesg |less
  # lspci
  # less /proc/interrupts
  # less /proc/ioports
  # less /proc/cpuinfo
  # less /proc/dma
  # less /proc/interrupts
  # ls /proc/bus/
  # less /proc/bus/*/*
  # ls /proc/driver
  # less /proc/dma
  # less /proc/iomem
  # less /proc/filesystems
  # ls /proc/ide /proc/scsi
  # less /proc/iomem
(Provide some demos)
M.E.'s comments about the above slide
Someone in the audience asked me how can they know what configuration options to choose to make their hardware work. This section will focus on how you can use information from your present kernel to help you make intelligent decisions on what to enable. This list is offered in order of importance and usefulness IMHO.
- # lsmod | less (Very useful!) It will list modules by name, and the names are excellent clues to the option you are choosing to enable. I have a sample showing a list of modules on one of my systems. In this list, you should notice items like "vfat", "fat", "hfs", and "parport". Though these don't offer immediate meaning to the beginning, they may help you as you choose options to enable. In this case, "hfs", "vfat", and "fat" are filesystem kernel modules to permit this system to use these filesystems.
Another helpful item with these, is the names of the modules can also be used when searching the kernel source tree: (You would substitute the name of your modules for MODULENAME:)
# cd /usr/src/linux-2.4.21/
# find . -iname \*MODULENAME\* -print |less
Once you have located a file that matches the name, you can inspect the path to the file and the actual source code. (Don't fear this step! You don't need to know how to program to do this.) The beginning of many files of source code for the kernel include comments on what the file is for. Use these comments to decide what the file is there to support and you can use that information to help you properly select the item in the kernel config step that will enable support for that code. - # dmesg | less (another good source of information) Should list information from your recently booted kernel. The size of data kept by dmesg is limited. A system that has hardware and kernel problems may not offer you a complete list of your kernel's boot message if new data has pushed out old data. You can see in this sample file that the sample booting kernel has left many messages for me to examine.
I have provided a very basic dmesg decomposition that shows what hardware should be chosen in a sample case. It is meant to be an example of the process to follow when looking at your dmesg, not a key for all system dmesg. When looking at your dmegs, just because you see an item and can find where to enable that item in the kernel config does not mean it should be enabled! You must decide if it is something you should have. Choices to enable support for hardware are almost always good to enable. However, not all users will want to enable "Netlink" support as few will have need for it.
- # lspci | less (helpful, but more cryptic) This provides a list of information about local hardware using the PCI bus. Its list can also provide helpful information. Here is a sample of lspci that you can inspect for this system.
I have provided a sample lspci with decomposition for review. This is not meant to be a list of options you will need, but instead a description of how it might be examined to help you choose what should be installed in your kernel.
The rest of these items have limited usefulness. In some cases, there are configurable options in the kernel that require you to specify IRQ, IO-Ports, and/or DMA. This is mostly with older sound cards, and is not so common with newer hardware. Do not let IRQ, DMA, and IO-Ports scare you away from the process! You will likely not even need to examine these if you have newer hardware. They are listed here so you have *something* to fall-back to using if you should find a kernel option that you enable asks for this information. If you look at the contents of each of your systems /proc/interrupts, /proc/ioports and /proc/dma, you should find the names of the devices that are using the various system resources.
- # less /proc/cpuinfo is useful for to help you know what kind of CPU you have on your system. (AMD, Cyrix, Intel, 386, 486, Pentium, Pentium with MMX, Pentium II, Pentium Pro, Pentium III, Pentium IV, etc.) This is useful for choosing the correct CPU in the configuration of your kernel. (This choice may only be available if you select to enable "Prompt for development and/or incomplete code/drivers" under "Code Maturity level options". This feature can then be found in "Processor type and features" here is a sample of the contents of cpuinfo on one of my boxes. You will note it is a Pentium III and only runs at 1 GHz.
- # less /proc/filesystems is useful for helping you to decide what filesystems to enable in your kernel. Most can be enabled as modules, but you will want to make sure you choose to enable all filesystem types that are required for boot as a static part of the kernel (choosing "Y" instead of "M".)
How do you know which filesystems you will need to enable as a static part of your kernel? Assuming you are not using initrd, netboot, etc., a review of the contents of /etc/fstab should tell you what filesystems are used at boot. Check out a sample /etc/fstab and pay attention to all of the entries that do not include "noauto" in the "options" field, and then look at these entries' "type" field. With exception to swap, you probably want to enable all types associated with entries that have not "noauto" options as a static part of the kernel ("Y") instead of modules ("M").
The /proc location is a kind of virtual space that appears to have files, but they are not files in the conventional sense. You can query these "files" by looking at their contents to gain information about your kernel or processes running on the machine. You should be safe if you just "look" at the contents. (E.G.: cat /proc/interrupts) but sending data over a file is risky when you do not know what you are doing. (E.G. Enable ip forwarding between interfaces: echo "1" >> /proc/sys/net/ipv4/ip_forward ).
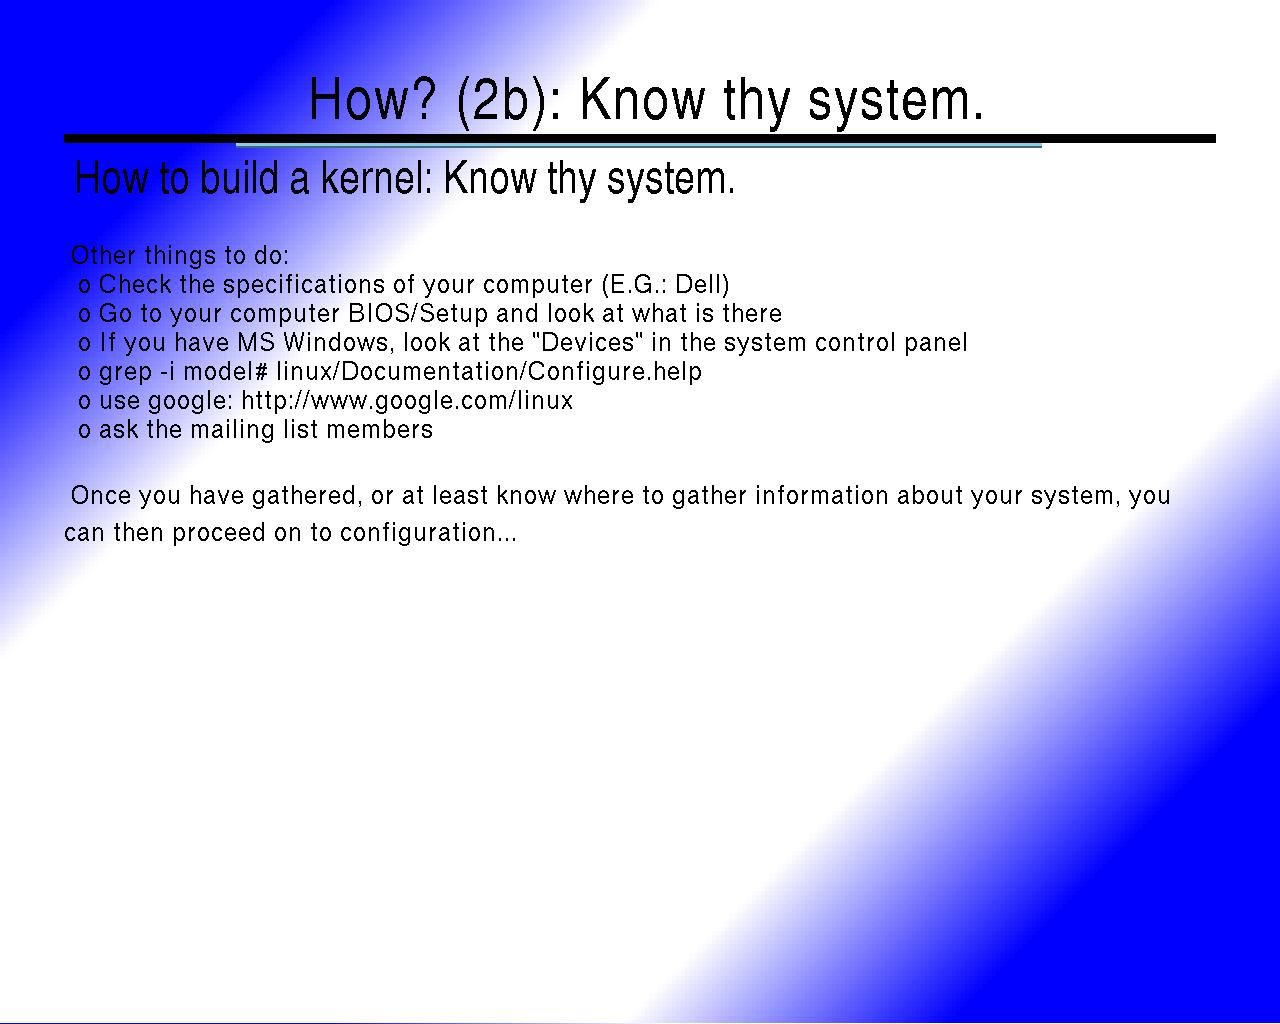
TEXT: Content of image-based slide above:
How? (2b): Know thy system.
How to build a kernel: Know thy system.
Other things to do:
- Check the specifications of your computer (E.G.: Dell)
- Go to your computer BIOS/Setup and look at what is there
- If you have MS Windows, look at the "Devices" in the system control panel
- grep -i model# linux/Documentation/Configure.help
- use google: http://www.google.com/linux
- ask the mailing list members
Once you have gathered, or at least know where to gather information about your system, you can then proceed on to configuration...
M.E.'s comments about the above slide
Interrogation of your Linux box is not the only method available to find out about the hardware of your machine.
- Many vendors of machines (like Dell) provide customers with unique product ID to allow for tracking of purchases, upgrades, and information about the machine that was ordered. Contacting your vendor can be very useful, as the information they have about your model or your specific machine can be a big help.
- Visit your computers BIOS settings (sometimes offered to users with on-screen message at boot with a reference like, "Press F2 to enter setup" where you can press the key specified and examine some of the settings to get an idea what hardware you may have.
- If you have MS Windows, you can examine the "System" control panel to see what devices that windows thinks you have. An examination of system resources like IRQ, DMA, and IO ports can also help you know what hardware your computer has.
- When you press "?" in the "make config" or "make menuconfig" or ask for help in "make xconfig" the text you see provided is actually stored in a kernel source file located in the "Documentation" folder of you Linux kernel source tree. "Configure.help" is a great place to search for model numbers or vendor names. (try using "less -i" and while viewing the file press "/" and enter search string. The "n" key is nice here to repeat the search to find multiple instances of the same keyword.)
- Don't underestimate the power of google. Google has a method to limit your searches to cover mostly Linux content. Try searching for your model number and vendor with google http://www.google.com/linux.
- Usenet newsgroups are sometimes useful for asking questions or searching for posts from others to help you.
- Visit your local Linux User Group's home page, mailing lists and or meetings.
- Searching our mailing list archives is another source for potential help.
- And of course, asking the members of the nblug "talk" mailing list may be of help you too.
TEXT: Content of image-based slide above:
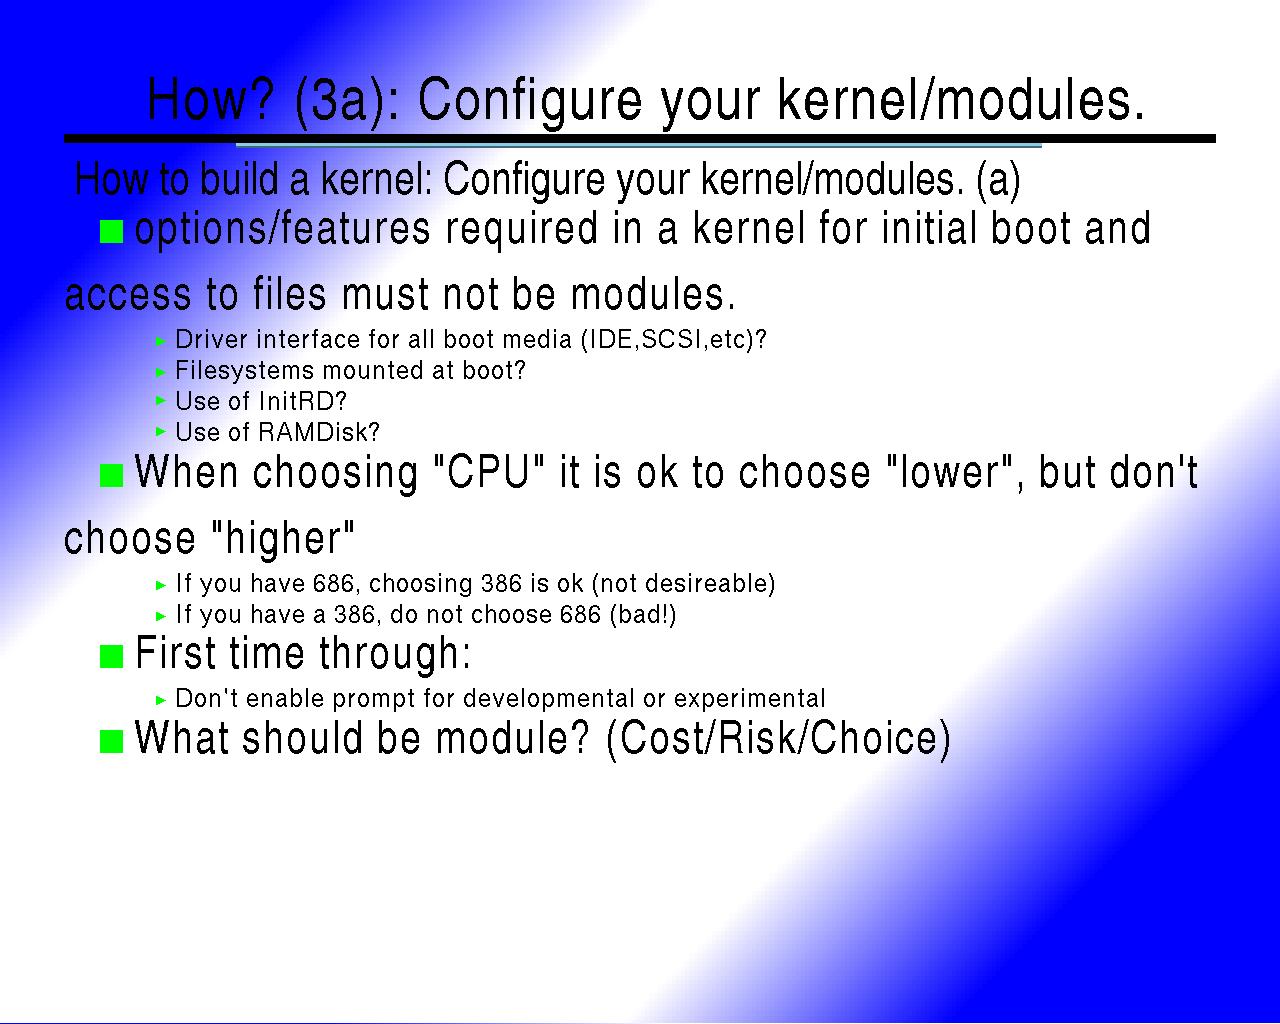
How? (3a): Configure your kernel/modules.
How to build a kernel: Configure your kernel/modules. (a)
- options/features required in a kernel for initial boot and access to files must not be modules.
- Driver interface for all boot media (IDE,SCSI,etc)?
- Filesystems mounted at boot?
- Use of InitRD?
- Use of RAMDisk?
- When choosing "CPU" it is ok to choose "lower", but don't choose "higher"
- If you have 686, choosing 386 is ok (not desirable)
- If you have a 386, do not choose 686 (bad!)
- First time through:
- Don't enable prompt for developmental or experimental
- What should be module? (Cost/Risk/Choice)
M.E.'s comments about the above slide
A user new to building kernels may incorrectly think that choosing to enable all options as part of the kernel would be a great way to go. This is not. First, it will likely not be possible to do this as your kernel would be too large. Second, it is wasteful of memory to enable options you will never use. Third, there are options that are best enabled as modules.
A new user to building kernels may incorrectly think that choosing to enable all options as modules would be best, so they only need to have a really small kernel and then can load modules as they are needed. However this will not work in most situations either, as your kernel will need to know about certain hardware in order to boot your system.
What to do? There is a balance between choosing modules, choosing to make options statically part of the kernel and choosing to not enable other options you will never use.
How do you decide what to enable, and once you decide to enable it, what should be a module and what should be static? Here are some guidelines to help you with this process:
- Your kernel (if not using initrd) must have support built into it for all options required to mount up the root filesystem ("/") that has attached to it "/etc", "/lib", "/dev", "/sbin", "/bin", "/proc", etc. So, support for the kind of drive interface you have should be a static part of your kernel and the filesystems required to mount this (these) should also be included. (See the "How? (2a): Know thy system" slide above for suggestions on what filesystems to enable.)
- What hard drive interface do I have?
- Examine the contents of /etc/fstab. On the first field, you should see entries like ("/dev/hda1", "/dev/hda2", "/dev/hda3","/dev/hdb2", "/dev/hdc3") and/or ("/dev/sda1", "/dev/sda5", "/dev/sdb2", "/dev/sdc1") and ("/dev/fd0") and ("/proc") as well as some others.
/dev/hd* (where the "*" is a wildcard for any letter and number) is a sign that you have an "IDE" or "ATA" style disk and suggests you should enable support for IDE/ATA disk interfaces as a static part of the kernel.
/dev/sd* (where the "*" is a wildcard for any letter and number) is a sign that you have a SCSI style disk and suggests you should enable support for SCSI disk interfaces as a static part of the kernel.
/dev/fd* (where the "*" is a wildcard for a number) is a sign that you have a floppy disk. If you need your floppy disk to boot Linux, then you should make this a static part of your kernel. If you do not need it to boot your system, then it can be made as a Module -- your choice.
/dev/cdrom is usually a symbolic links that points to a real device. If you have names like this, you should see what they point to. Try to find out what the link(s) point to ("# ls -la /dev/cdrom") and then use the above to help you.
- Examine the contents of /etc/fstab. On the first field, you should see entries like ("/dev/hda1", "/dev/hda2", "/dev/hda3","/dev/hdb2", "/dev/hdc3") and/or ("/dev/sda1", "/dev/sda5", "/dev/sdb2", "/dev/sdc1") and ("/dev/fd0") and ("/proc") as well as some others.

TEXT: Content of image-based slide above:
How? (3b): Configure your kernel/modules.
How to build a kernel: Configure your kernel/modules. (b)
- Download (ftp text file)
- Verify sig (same file - optional)
- Unpack (same file)
- cd and clean:
- NOTE: make mrproper will delete any previous ".config" file!
# make clean && make mrproper
Choose one configure from below:
# make configure (old, user unfriendly)
# make menuconfig (newer, uses ncurses/curses, may fail if not installed)
# make xconfig (nicer, but limited: only runs in "X")
- NOTE: make mrproper will delete any previous ".config" file!
M.E.'s comments about the above slide
First if you go with a kernel.org "stock" kernel, then you download it, then you verify the gpg sig, and then you unpack (uncompress and untar the source.)
Next you clean and ensure the code is set to some common state. *NOTE: make mrproper will destroy your ".config" file. If this is your first kernel, this is probably not so bad. If you are rebuilding your kernel, then "make clean" may be better for you than make mrproper so you can get the configured options from the previous build.
If you choose to run "make config" you will be offered a very simple, user-unfriendly interface. If you press control-c at any time during the prompting process after starting "make config" then all of the entries you have selected will be lost. If you make a mistake in your selection, you can't go back in the "make config" system (for all of these reasons, I suggest you use "make menuconfig" or "make xconfig" if either are available.
Assuming you use "make config" you will be prompted with questions to choose how to enable an option like these: "[Y/n/?]" , "[Y/n/m/?]", "[M/n/?]", "[SOME OPTION]". When you see these, any single capital letter is the "default" if you just press return. In cases where a complete WORD is in all capitals, or a number is listed by itself, that is the default. A "?" is never the default selection. The "?" permits you to select "?" (and return) to find out what the option will offer you. You can think of "?" as a kind of "help" for the option. Some options do not have help available.
I have a sample "make config" session available for review. This is an advanced sample for a kernel that has many more options than are required for the hardware that is using it. Many unnecessary options are set as "M" (Modules). You probably should not just duplicate all of my selections. This will not help you learn.
The first time through building your kernel, stop on each option, and choose "?" to understand what the option does. This will take a long time, but is an investment in your future builds.
TEXT: Content of image-based slide above:
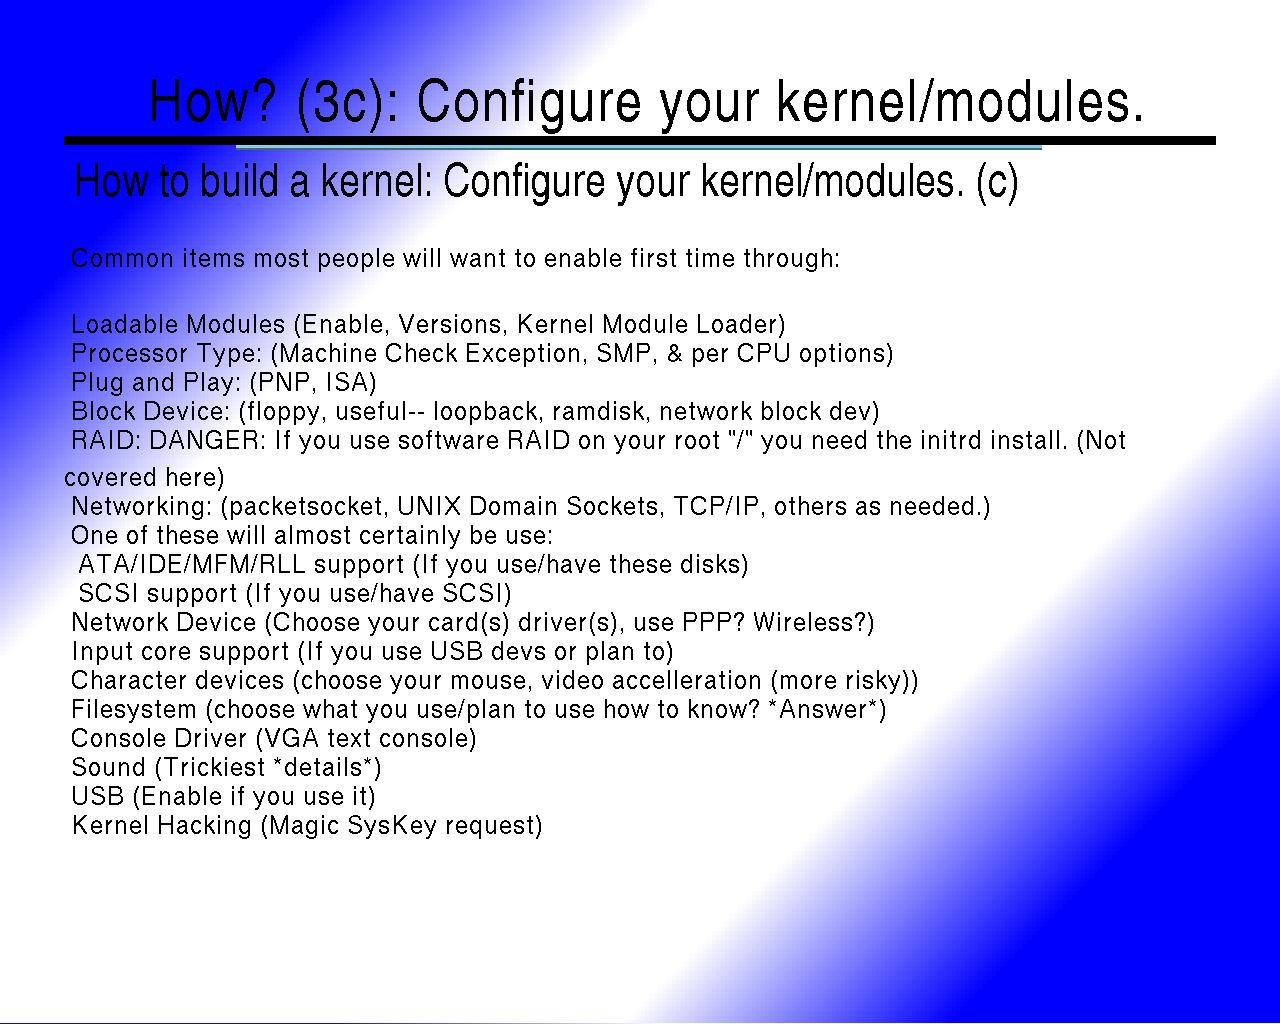
How? (3c): Configure your kernel/modules.
How to build a kernel: Configure your kernel/modules. (c)
Common items most people will want to enable first time through:
- Loadable Modules (Enable, Versions, Kernel Module Loader)
- Processor Type: (Machine Check Exception, SMP, & per CPU options)
- Plug and Play: (PNP, ISA)
- Block Device: (floppy, useful-- loopback, ramdisk, network block dev)
- RAID: DANGER: If you use software RAID on your root "/" you need the initrd install. (Not covered here)
- Networking: (packetsocket, UNIX Domain Sockets, TCP/IP, others as needed.)
- One of these will almost certainly be use:
- ATA/IDE/MFM/RLL support (If you use/have these disks)
- SCSI support (If you use/have SCSI)
- Network Device (Choose your card(s) driver(s), use PPP? Wireless?)
- Input core support (If you use USB devs or plan to)
- Character devices (choose your mouse, video acceleration (more risky))
- Filesystem (choose what you use/plan to use how to know? *Answer*)
- Console Driver (VGA text console)
- Sound (Trickiest *details*)
- USB (Enable if you use it)
- Kernel Hacking (Magic SysKey request)
M.E.'s comments about the above slide
This slide covers a number of items that I think your should enable as a minimum in your first kernel. You will almost certainly need to enable much more than these items, but it is a good place to start.
One of our members stated during this presentation that you may have extra options in the IDE/ATA section. There are newer, faster interfaces that have special drivers. Examination of your dmesg data and comparing each IDE option to entries in the kernel config to information in the dmesg output may help you to select the options you will need.

TEXT: Content of image-based slide above:
How? (3d): Configure your kernel/modules.
How to build a kernel: Configure your kernel/modules. (d)
Come back here after you have built a minimal working kernel.
Now that you have been through it once, review it again and then build if you add new features.
Once you have a working kernel, you will likely want to re-configure and enable "Code maturity level options" and choose to enable the "dev options"
Then, revisit all of the option sections and examine anything that looks new. If you find a new item that looks like it is something you need, then try enabling it.
Limit the number of developmental items you enable at any one time to minimize troubleshooting if an option is not helpful.
Build new one and test it.
M.E.'s comments about the above slide
The first time through your kernel config it is a good idea to not enable the option "Prompt for development and/or incomplete code/drivers." Not enabling this offers you some flexibility in what is selected. For the most part, selecting something you do not have while "Prompt for development and/or incomplete code/drivers" is not enabled won't prevent your kernel from booting and working. However, once you enable "Prompt for development and/or incomplete code/drivers" you do get advanced features, but some of these features can cause serious problems with booting or using a kernel and some are in early development and experimental.
It is for the above that I suggest the above procedure. Examine anything that is "NEW" (use the "?" or help to find out more about them) in the second pass.
Remember, building your first fully optimized kernel is an iterative process where each configuration and build brings you closer to your goal. Though this process is costly with initial investment in time, future builds, or upgrades are much, much easier (with make oldconfig -- see more about it later.)
TEXT: Content of image-based slide above:
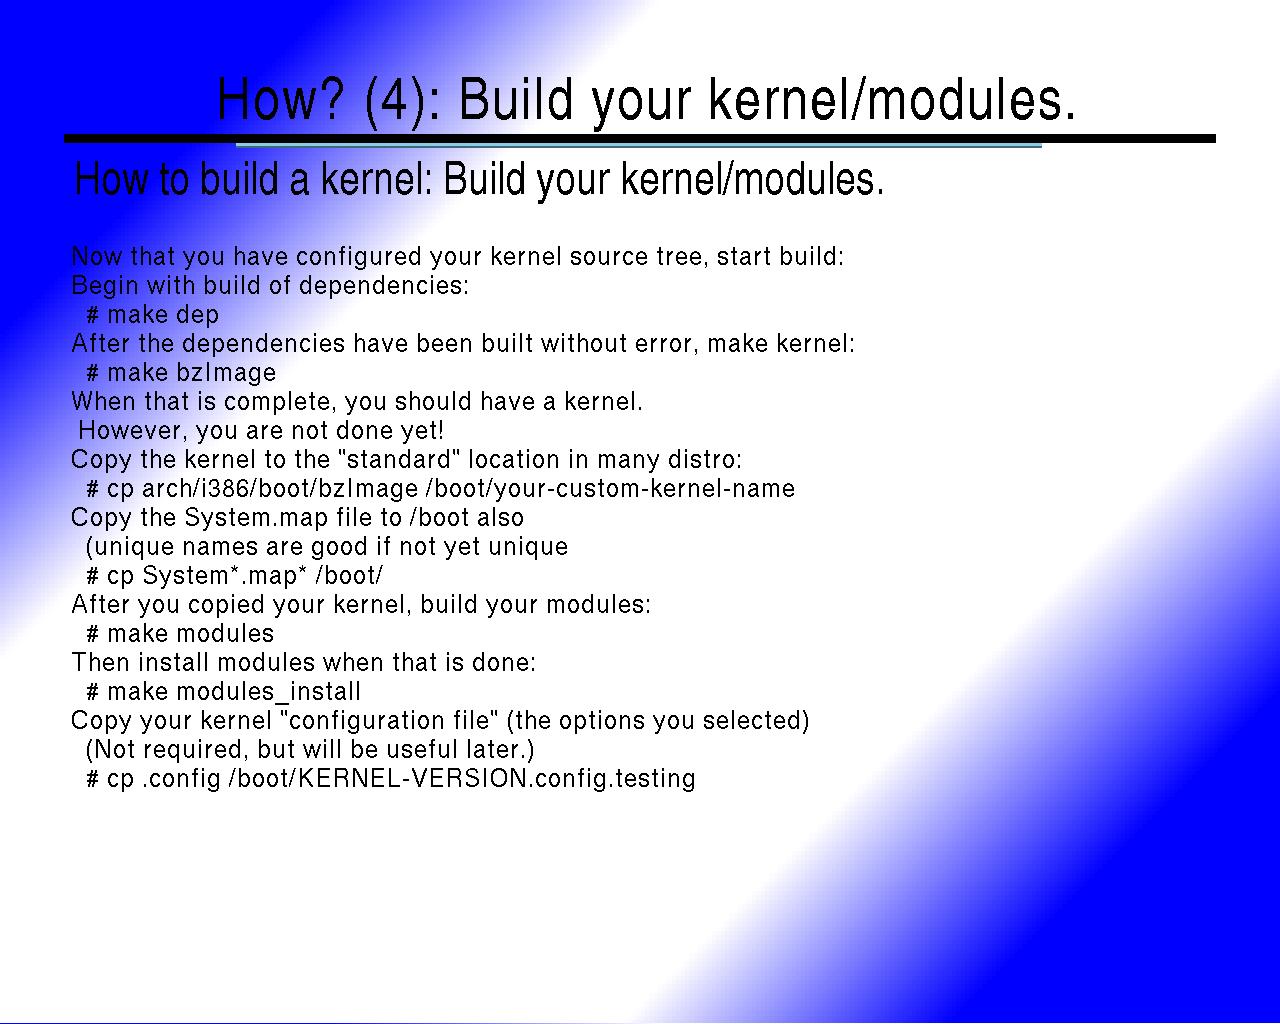
How? (4): Build your kernel/modules.
How to build a kernel: Build your kernel/modules.
Now that you have configured your kernel source tree, start build:
- Begin with build of dependencies:
# make dep - After the dependencies have been built without error, make kernel:
# make bzImage - When that is complete, you should have a kernel.
However, you are not done yet! - Copy the kernel to the "standard" location in many distro:
# cp arch/i386/boot/bzImage /boot/your-custom-kernel-name - Copy the System.map file to /boot also
(unique names are good if not yet unique
# cp System*.map* /boot/ - After you copied your kernel, build your modules:
# make modules - Then install modules when that is done:
# make modules_install - Copy your kernel "configuration file" (the options you selected)
(Not required, but will be useful later.)
# cp .config /boot/KERNEL-VERSION.config.testing
M.E.'s comments about the above slide
There are many places out there that walk through the general process for "making" your new kernel. They offer details in this part of the process. In order to avoid duplication of effort, I will just link to an example: http://www.ibiblio.org/pub/Linux/docs/HOWTO/other-formats/html_single/Kernel-HOWTO.html
TEXT: Content of image-based slide above:
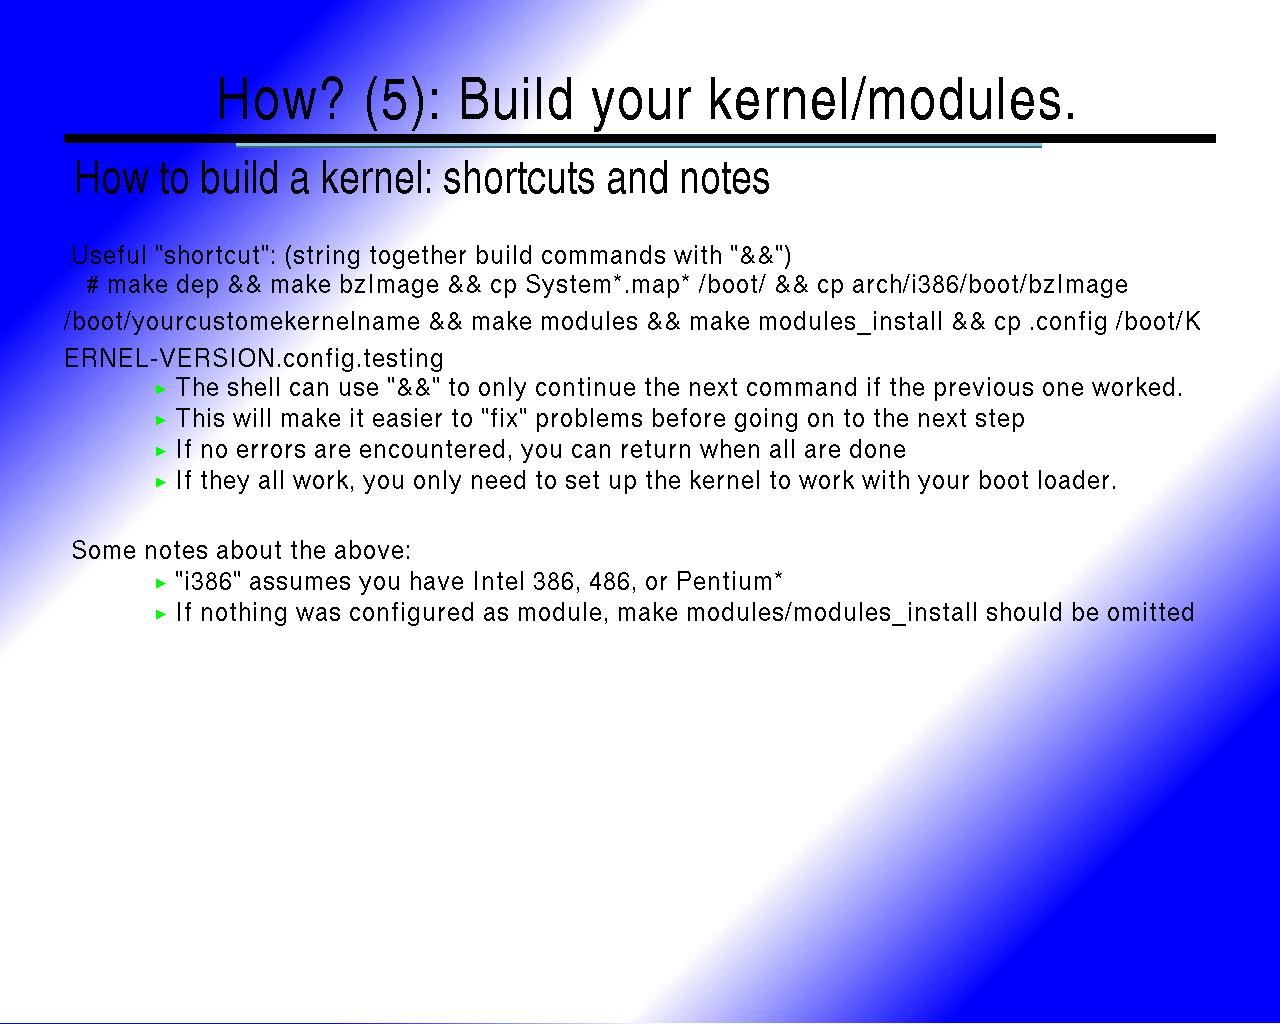
How? (5): Build your kernel/modules.
How to build a kernel: shortcuts and notes
Useful "shortcut": (string together build commands with "&&")
# make dep && make bzImage && cp System*.map* /boot/ && cp arch/i386/boot/bzImage /boot/yourcustomekernelname && make modules && make modules_install && cp .config /boot/KERNEL-VERSION.config.testing
- The shell can use "&&" to only continue the next command if the previous one worked.
- This will make it easier to "fix" problems before going on to the next step
- If no errors are encountered, you can return when all are done
- If they all work, you only need to set up the kernel to work with your boot loader.
Some notes about the above:
- "i386" assumes you have Intel 386, 486, or Pentium*
- If nothing was configured as module, make modules/modules_install should be omitted
M.E.'s comments about the above slide
Building kernels can be a tedious process, and one where it may take older machine hours to complete. By "chaining" one command to execute only when the previous command completes successfully can make your life easier. In this way you can start the process and come back later when all builds are completed. If an error was encountered, you can see the error messages from the command that failed. (A feature that is lost when commands are chained together with ";" since the next command is run even if the previous one fails. Use of && between each command to be done in serialized fashion is very useful.)

TEXT: Content of image-based slide above:
How? (5): Install Kernel/modules.
How to build a kernel: Install Kernel/modules.
- Modification of your Boot Loader:
- Two choices for boot loaders
- Grub
- Lilo
- Using LILO:
- edit /etc/lilo.conf
- add entries for your new kernel (demo)
- run lilo to update the MBR (critical! must do this)
- Using grub:
- I wont cover (little time, not what I use)
- Grub is newer
- Has more user friendly features for installs
Do not delete old kernels right away. Test new ones well.
- Two choices for boot loaders
M.E.'s comments about the above slide
I offered an example of installing a kernel with lilo at the meeting, but such a demo in this paper would be a duplication of effort. Here are some links for howto's for grub and lilo with installing new kernels:
http://www.ibiblio.org/pub/Linux/docs/HOWTO/mini/other-formats/html_single/Multiboot-with-LILO.html
http://www.ibiblio.org/pub/Linux/docs/HOWTO/mini/other-formats/html_single/Multiboot-with-GRUB.html

TEXT: Content of image-based slide above:
How? (6): Review Test your kernel.
How to build a kernel: Test your kernel.
Now reboot your system.
Test out your kernel.
Check to see if all of your devices work.
If something does not work, verify you enabled an options for it.
Re-configure a new kernel, rebuild, re-install, retest.
M.E.'s comments about the above slide
Simple slide. Simple idea. This describes the iterative process that helps your to refine your system kernel until you have full support for everything your distribution's kernel provided.
TEXT: Content of image-based slide above:
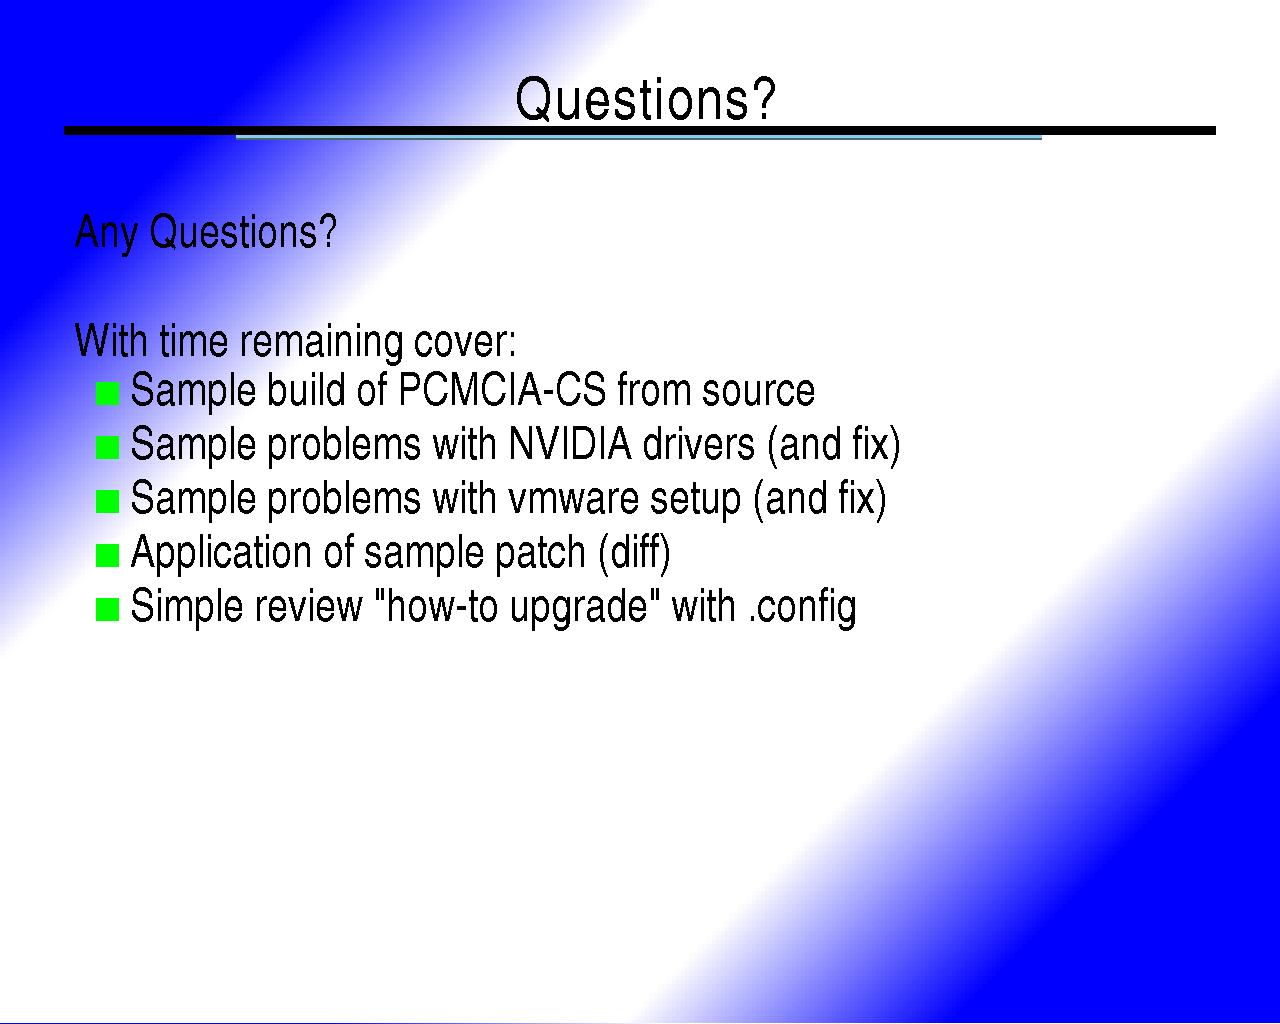
Questions?
Any Questions?
With time remaining cover:
- Sample build of PCMCIA-CS from source
- Sample problems with NVIDIA drivers (and fix)
- Sample problems with vmware setup (and fix)
- Application of sample patch (diff)
- Simple review "how-to upgrade" with .config
M.E.'s comments about the above slide
Here is where I plan to provide sample sessions of where I make the following work:
- PCMCIA
- There are PCMCIA HOWTO: that cover this.
- There is also the pcmcia-cs project home http://sourceforge.net/projects/pcmcia-cs/.
- However, I thought I would provide a sample session file for a pcmcia build I completed after a kernel build.
- NVIDIA
- In the past, Nvidia provided two methods for drivers.
- Download source version for people who build their own kernels.
- Download rpm files for people who user certain prepackaged kernels.
- After the presentation, I was informed by a fellow NBLUG member that the nVidia driver process is much nicer now.
- Download a ".run" file from nvidia
- Exit "X" and shutdown your X applications (like gdm and/or xdm.)
- Run the ".run" script from nVidia
- It will determine that none of the pre-existing drivers were built to work with your custom kernel.
- Eventually, it will tell you it needs to compile its own drivers
- Then it will compile and install them and you should be done
- A reboot would be good to test - to make sure everything comes back up.
- In the past, Nvidia provided two methods for drivers.
- VMWARE
- I won't spend much time on this part. VMWare is a commercial product. Here is a sample session from an update to make vmware work with a custom kernel.
- Application of a diff patch:
- There are many diff patches for kernels. I have chosen one from http://www.openwall.com/linux/ as a kernel security enhancement.
- I generally make a folder called "patches" in /usr/src and store my patch files there.
- I have a sample session showing me making the patches folder, downloading a patch for linux-2.4.21, and then applying the patch.
- Using "make oldconfig" with a previously, properly configured kernel to make upgrades easy.
- In a sample session you can view the effects of copying a ".config" file from a linux-2.4.20 kernel to a brand new linux-2.4.21 kernel tree.
- In this sample, you can see I try to use "? to find out about the new options. Some do not have information available and some do have it available. In this case, I take the conservative route and do not enable anything I do not know about, and choose not to enable any options for which I do not have hardware.
TEXT: Content of image-based slide above:
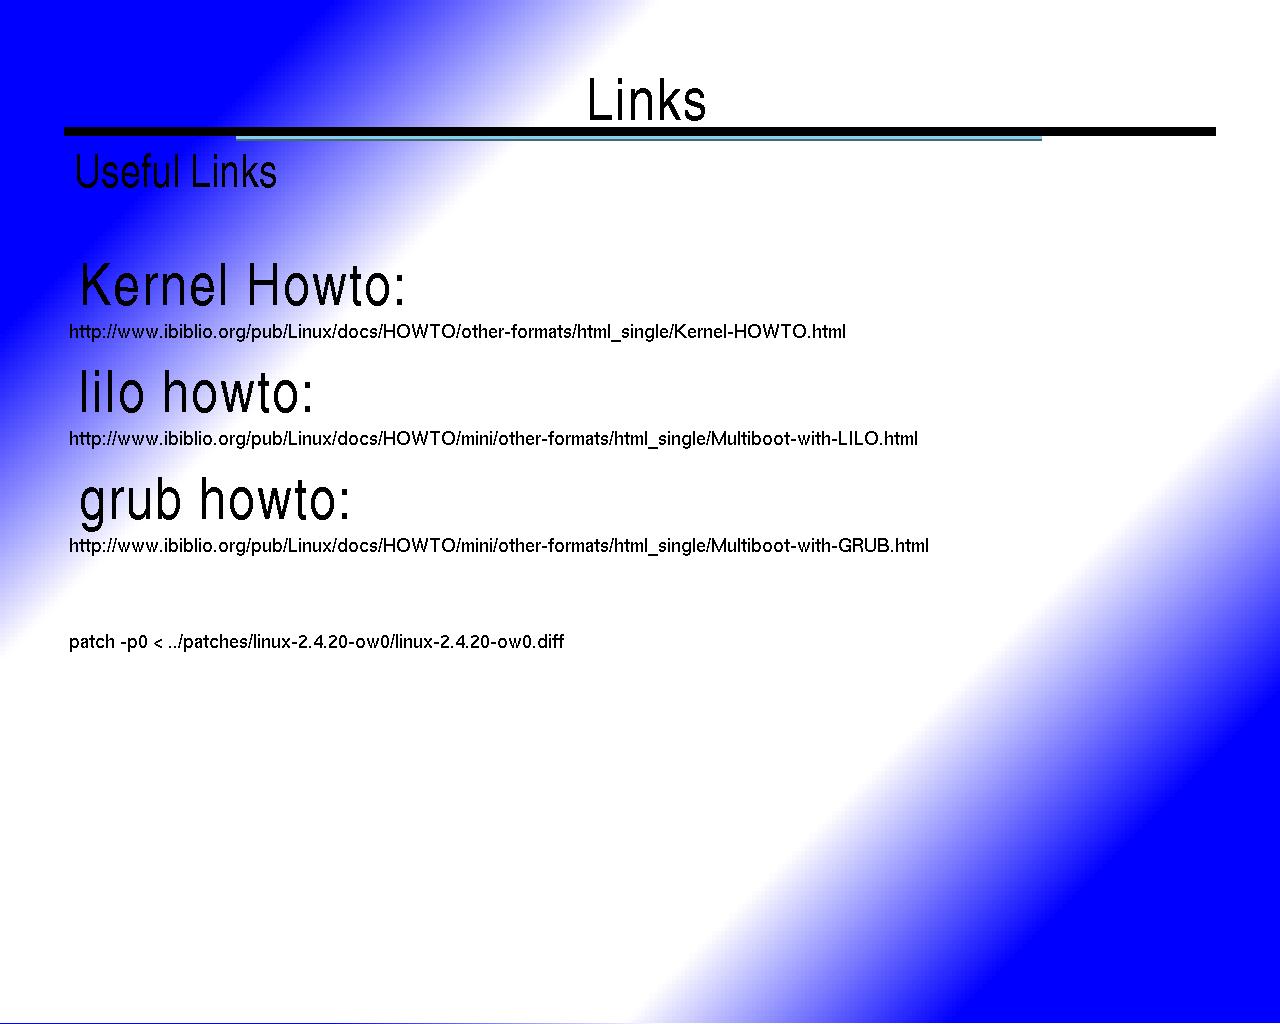
Links
Useful Links
- Kernel Howto:
http://www.ibiblio.org/pub/Linux/docs/HOWTO/other-formats/html_single/Kernel-HOWTO.html
- lilo howto:
http://www.ibiblio.org/pub/Linux/docs/HOWTO/mini/other-formats/html_single/Multiboot-with-LILO.html
- grub howto:
http://www.ibiblio.org/pub/Linux/docs/HOWTO/mini/other-formats/html_single/Multiboot-with-GRUB.html
patch -p0 < ../patches/linux-2.4.20-ow0/linux-2.4.20-ow0.diff
(The "patch" line above was added to the presentation as a reminder for me to cover this when I put this presentation online.)
M.E.'s comments about the above slide
links:
- http://www.ibiblio.org/pub/Linux/docs/HOWTO/other-formats/html_single/Kernel-HOWTO.html
- http://www.ibiblio.org/pub/Linux/docs/HOWTO/mini/other-formats/html_single/Multiboot-with-LILO.html
- http://www.ibiblio.org/pub/Linux/docs/HOWTO/mini/other-formats/html_single/Multiboot-with-GRUB.html
- http://sourceforge.net/projects/pcmcia-cs/.
- http://www.google.com/linux to search google
- http://www.nblug.org/
- http://www.nblug.org/mailinglist.shtml
- http://www.nblug.org/search.shtml to search our mailing lists
- http://www.nblug.org/pipermail/talk/ nblug talk list archives
- http://www.nblug.org/irc.shtml to visit our IRC channel and maybe find someone awake to answer a question.
- ftp://ftp.kernel.org/pub/linux/kernel/v2.4/ has copies of stock kernels.
- http://www.kernel.org/signature.html offers information about the gpg sig process at kernel.org.
- http://www.openwall.com/linux/ contains the kernel patches that I demonstrated at the presentation.